
The most common question I’m asked re base tuning concerns what iron to use, so we’ll get this out of the way first. Many tuners use a flat base travel iron (without the holes!) without any problems. However, they are not very controllable with their thermostats having very wide ranging tolerances & their thin bases get hot spots, either of which could lead to oveheating or having to keep waiting for the iron to come back up to temperature. A specifically designed wax iron has a far narrower tolerance thermostat & a nice ski width rectangular base that’s a lot thicker than a conventional iron, enabling it to hold a constant & equal temperature across its width. Simply put a proper wax iron is just way easier & safer to use so it’s up to you to balance the cost/risk/ease equation for yourself.
Back to the base tuning prcesses:
Repair any base damage prior to base tuning. See separate section.
Check base flatness with a true bar under a good light. If there’s any concavity or convexity then the base needs a stone grind from a specialist shop. It’s also important to check the flatness of new skis as they continue to cure when they come out of the mould & can move etc. Caution: Many modern wider skis do have a slightly concave base towards the tip & tail which should not be ground flat – a 10/15mm flat section down the outside edges of the p-tex is all that’s required.
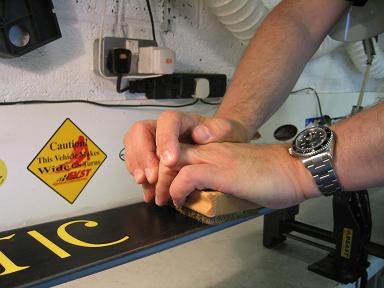
Apply side wall tape to stop wax getting everywhere & lay the ski base up on the outer support vices & clamp it in the centre vice. From now on all base tuning work is always done from tip to tail.
 Use a brass brush to clean the base & open up the structure. The ‘structure’ is name given to the feint longitudinal grooves in the base of the ski that allow the moisture/water in the snow to squeeze out much in the same way as a car's tire grooves work on the road. Without structure the base would just stick to the snow by suction. Three passes of firm pressure overlapping stokes, again walking down the base is all that’s required. Dry scrape the base a couple of times to remove debris & use a large soft paint brush to wipe away the dust etc, followed by a wipe with a piece of fiberleen cloth. If you ever want to add additional structure to the ski base without having a stone grind then a specific base structure tool can be used although I prefer to just give the bases a real good tip to tail brushing with a very stiff stainless steel ‘base structure’ brush. Now release the centre vice as this restricts the ski from ‘expanding’ in to reverse camber when heater by the iron which restricts the p-tex base from opening fully & restricts wax absorption.
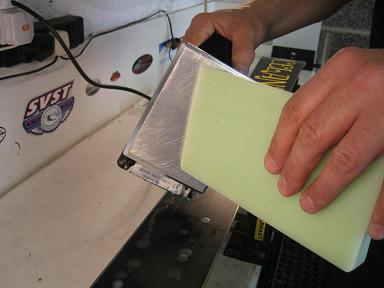 Perform a ‘hot scrape’ using a soft wax to clean the base of the ski. A ‘hot scrape’ is when the molten wax is immediately scraped off after being ironed in to the ski to pull out the dirt held within the base. You’ll notice the black dirt smears in the scraped wax. If the base is very dirty then this can be repeated until the wax scrapes clean. Don’t use a wax remover or other chemicals to clean the base as it dries it out. The only time to use a wax remover on the base would be to clean a damaged area prior to a repair. However, wax remover is great for cleaning scrapers & the bench top etc.
Use a brass brush to clean the base & open up the structure. Three passes of firm pressure overlapping stokes, again walking down the base is all that’s required. Use a large soft paint brush to wipe away the dust etc, followed by a wipe with a piece of clean dry cloth.
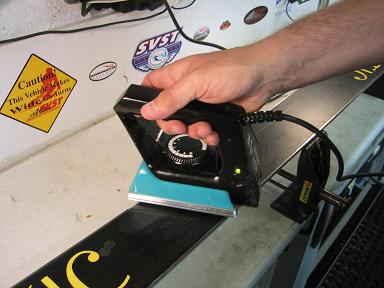 Hot wax again with your chosen wax for the conditions & but now leave to fully cool* to enable the wax to be fully absorbed in to the base. Approx 12/15g of wax is required to properly wax the average pair of skis. Touching the wax block on the hot iron (known as hot touching) & then crayoning the wax on to the base before dripping it on saves waxes & can help prevent the base from burning if the iron is accidentally too hot. Hot touching wax for very low temperature snow is highly recommended as it’s so hard that you need a high iron setting to melt the wax in to the base. To gain the ultimate in wax absorbency the skis can be put in a ‘hot box’ for a few hours. See my 'Services' section for more information about hot boxing. *Note: It's really important point to allow the wax to cool properly before scraping. When we're hot waxing the ski, heat transferred from the iron to the ski's base expands its pores allowing it to be impregnated by molten wax. Equally important as waxing the ski properly is the ‘cooling down’ phase. Having that very porous ski base that you’ve just expanded with the heat of your wax iron fully cool down slowly at room temperature (about 22C/70F) provides the perfect environment for proper wax impregnation. What you’re trying to achieve is a very slow, deliberate closing or contracting of the ski’s base to retain all the wax. Don’t be tempted to stick your skis outside into temperatures that are way lower than your ideal working environment directly after waxing. Dramatic temperature changes like this cause the pores to close too fast which will push wax out rather than allowing it to cool slowly and adhere inside the skis base material. Your wax manufacturer should supply information as too how long to leave the skis to cool before scraping. For example, Dominator Wax recommend a period of at least 90 minutes for their Zoom universal wax before scraping.
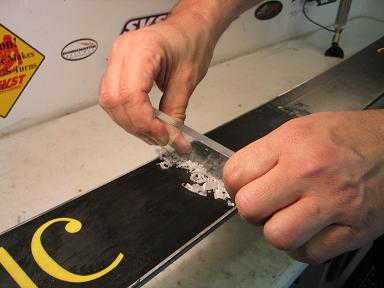
Now the ski is cool clamp it in the centre vice for security & safety. Scrape with a sharp plexiglass scraper. Keep your plexi scraper sharp & use the notched, angled & rounded corners to scrape the wax off the edges & the sidewall. I prefer a 6mm scraper to the thinner ones that are available as they stay straight rather that bending in the middle which can then lead to you scraping the bases concave.
This step for new skis only. New skis arrive at the store with plenty of graphite dust in the pores and coarse microscopic hairs are left on the base from the original grind. The factory wax is also for protection rather than performance. If the factory structure pattern is too shallow (it saves the factory having to do a lot of expensive post grind base smoothing) it can be enhanced with a few passes of a steel structure brush & then fibertex pads in varying grades to remove the fuzz from the 'peaks'’, knocking them down somewhat & smoothing out the structure. Warm, low melting point waxes perform an excellent clean & have great penetration in a new base. Even better are the specific waxes just for this purpose like Dominator Zoom Renew. So on new skis repeat the wax/cool/scrape & brush steps as many times as possible as the base needs 'loading up' with wax to give protection & speed. To gain the ultimate in wax absorbency the skis can be put in a ‘hot box’ for a few hours. See my 'Services' section for more information about hot boxing. Between each wax cycle give the skis loads of brass brushing & fiberpad passes (say 10 passes of each) after each wax. For one or two of the waxes use a very cold temperature wax as it cools faster so it traps the hairs that have floated up in the melt. It is very cohesive when cool so the hairs get trapped & snapped off by the sharp of the scraper. A thick, rigid & sharp scraper is vital for this step. Occasional future applications of cold waxes also help eliminate coarseness from a base. Top World Cup tuners may do 50 waxes & scrape cycles on their race skis before they hit the snow so don’t think you’re being anal by doing it at least a few times!
Brass brush again for initial polishing & to clear the wax out of the structure. Again, three firm passes.
Horsehair brush for secondary polishing & final structure cleaning. Three passes.
Nylon brush for final polishing. Three passes.
Wipe down the base with a clean dry cloth.